Pages

Showing posts with label Birthday. Show all posts

Sunday, October 27, 2013

Gorgeous Grunge Gift Card Holder

There are only 1 day left to save 25% off on one of my favourite stamp sets.  I just love Gorgeous Grunge, my girls are getting older now and this set is great for a fun quick gift card or birthday card.

My daughter is turning 9 and her party was today, as a gift in the treat bags we agreed on a Chapters Gift Card.   I was sitting in my craft room last night thinking about a quick way to decorate these gift cards so here we go.
I used bright colours and just went for it.  A couple of quick stamps and I'm done!  The Awesome Thanks comes from "Yippee-Skippee" 


This is just a single sheet of card stock measuring 8 1/4" x 4 1/4" then scored at 2 3/4" , 3 3/4" ,
4 3/4" and 7 1/2".

I then folded it to have an interior pocket (which I created by cutting a slit in the inner flap).   There is a little 1/2 flap on the outside to seal the card shut.  (sorry I forgot to photograph that part).

So easy!!

Below are a couple of pictures of the party.  I lady in my neighbourhood made this amazing cake and below that is my beautiful girl who will be nine on Halloween!!


Don't Forget the Weekly Deals and the 25% off 25 Stamps!!!

Weekly Deals


Let the party begin-We'll bring the gifts! 25% Off 25 Stamp Sets. Hurry-sale ends October 28 - Start saving


Janet Y


Saturday, August 24, 2013

WORST CARD EVER .. Ok maybe Not!!

A couple of days ago I got inspired to try a fishbowl card with actual water. I have seen a couple of these and thought "How hard could that be?"  AHH, famous last words!!

I gathered my tools; a hot glue gun, window sheet, treat cup(s) and of course my cute little stamp!

I stamped my image on Whisper White and coloured it with my Copic Markers, yes I am one of those people who loves my copics, but more on that later.  Once I had the cute little fish bowl ready I plugged in my hot glue gun and cut out a 2 3/4" square window sheet to fit on the back of my treat cup. 
The idea was that I fill the cup with water and few sparkles, spread hot glue around the edge and attach my window sheet getting a great watertight seal!  Easy right?  Yeah NO!

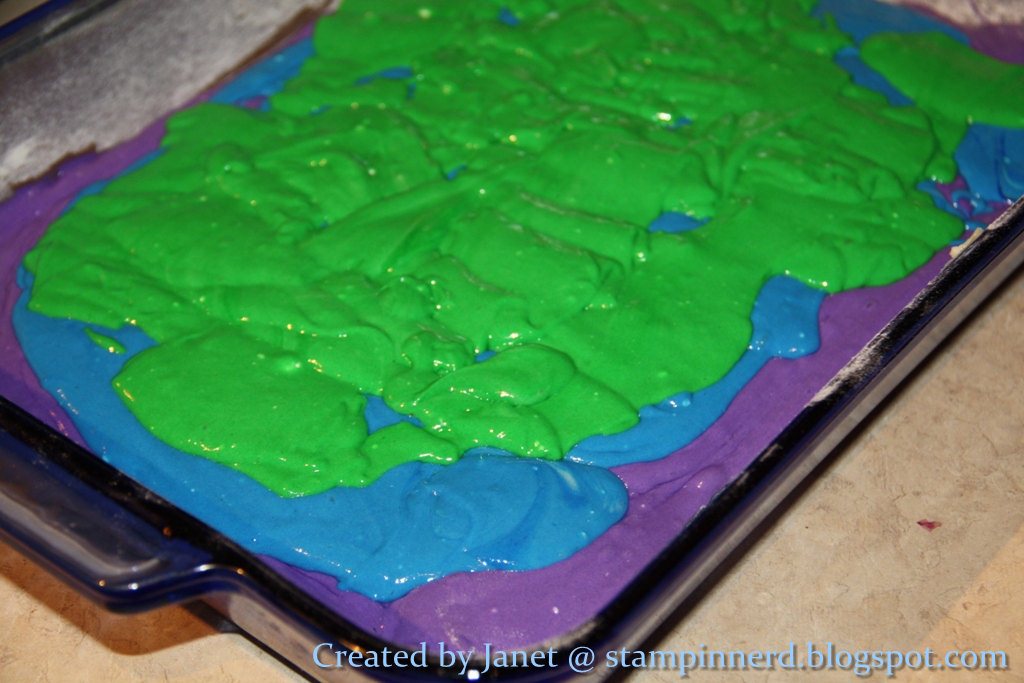
Here is a picture of my first couple of tries!
 
So I think the first time the glue was not hot enough, the second time I was not fast enough and that third try I used white glue, yeah, don't do that!  It does not work, at all!

 
So I forgot to take a picture of my final cup but it looks very much like the top picture, maybe a little neater but not much. I hid the monstrous mess below some pretty DSP and Cardstock!
 
In the end I got a really great card and I learned that hot glue is not my friend.  I was never very crafty until I got hooked on Stampin' UP, for just this reason!  If only SU made "watertight seal adhesive" :)
 
Here it is, the card that caused me to run next door cursing and smiling at the same time. 
 I always vent to my wonderful neighbour!
 

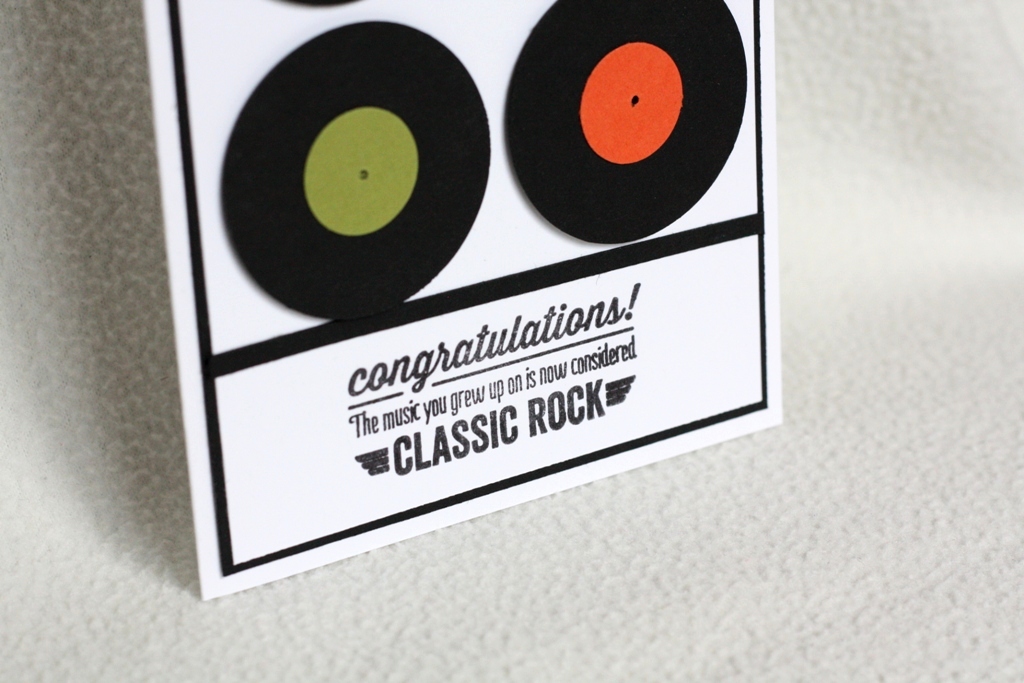
 On with the details of the card.  When I finally got a workable fishbowl I had to come up with a super cute card that would show off my creation!  In the end I wanted something simple that would highlight the fishbowl and not detract from it.

I used a white base with layers of Rich Razzelberry, Pumpkin Pie, more White and a Tempting Turquoise DSP on the top.  I added some Pumpkin Pie Candy Dots and a white banner with my sentiment.

 
I used a lot of Dimentionals to allow for the thickness of my treat cup (with all that glue), I had to double up.   I stamped the fishbowl on the Turquoise DSP and punched out a 1 3/8 circle to allow the treat cup to come through.
 
Now I mentioned my Copics earlier and I have never mentioned them before so here is my confession.  Stampin' Up used to have a policy about using Non-Stampin Up products and as a Demo I could not promote them on my blog.  I kept them in my craft room, hidden from view and only pulled them out for my own use and for fun.  They are so fun to colour with and face it your inner child wants to colour, its a great stress reliever too!
 
Copics are alcohol based and they blend and colour so beautifully.  I wanted my fish to really pop.  The colours were so vibrant that I used them on the sentiment too!
 
Ok so my worst card ever turned out to be super cute and I cannot wait to give it to someone!
 
Thanks for looking and please let me know what you think!


And don't forget to check out the LNS Treasure Hunt for your chance to win FREE Stampin' Up Products!   Click Here.
 
 
Janet Y


Friday, August 23, 2013

Challenge -- Freshly Made Sketches #100!


Well my frustration level is at an all time high today!  I have been trying to enter this Challenge for 2 days now and have had nothing but trouble with my photo editing software!   I purchased a new laptop a couple of weeks ago and try as I might this new Windows 8 is just driving me nuts!   I also got the all new and not so improved Microsoft office.  This new software is lacking in one major area, Photo Software!  I used to use and love Microsoft Picture Manger, it is now gone and I miss it A LOT!  I have finally settled on Corell Paintshop and it seems to be getting the job done, there is a learning curve but it's coming along.  

Ok enough ranting!!!   Lets get to the Challenge. 

This week is FMS 100th sketch!  I have been living and breathing Christmas, Halloween and Thanksgiving in my craft room lately so Wedensday I took a break from all of that and made some Birthday cards.   Below in one of the cards I made and I just love the colours and fun of it all.


Ok so I admit I might have gotten a little carried away with the editing.  It's a bit dark but I will work on that for next time!

This card was made using the Birthday Basics DSP.  I got all of the great rich colours from this paper.  I used Very Vanilla for the base and Bermuda Bay for the first layer. Then I used Raspberry Ripple and Crisp Cantaloupe for my accent colours.

Check out the link below to see the other great entries and inspiration.

 
And don't forget to check out the LNS Treasure Hunt for your chance to win FREE Stampin' Up Products!   Click Here.
 
 
Janet Y


Wednesday, June 12, 2013

Challenge -- Freshly Made Sketches #90

Well last week I made a card but with all of my good intentions I did not get it entered to FMS on time so this week I felt I needed to do it just on principle LOL.   I actually really like this very simple sketch.  There are so many ways you could go with this.  I just got my brand new Sketched Birthday Stamp set and I wanted get creating with it.  I also just received my Core'dinations Paper and really wanted to play with that. 

I went with a Black and Bermuda Bay for my colours and I used Embossing Powders in Black and White.


I added a little splash of colour with a Real Red, Pumpkin Pie and Daffodil Delight Balloons.

I just love this Stamp Set!!


Let me know what you think!  I would love to hear from you.
 

To see all of the great entries and examples for this challenge check out
Freshly Made Sketches #90
Janet Y

Sunday, May 26, 2013

It's a Beautiful Day Today + a Sneak Peek

The sun was out all day today and the weather was amazing!  My kids were outside ALL day!  I love it when that happens.  Of course I was inside most of the day cleaning, but what can you do?  I hear we are getting more rain so I will soak up as much of the sun as I can! 

On another note we are less than a week away until the new Catalogue comes in to effect and I am super excited about starting my swaps for Convention and ordering product shares for my clients (I will post these soon on here too).

In my pre-order from the new Catalogue I got this totally funky new product called Simply Pressed Clay!  Yes, that's right, Clay!!  I also got the Buttons and Blossoms Simply Pressed Clay Molds!  I have made about 8 buttons and flowers in various colours and finally used one in a project.  Check it out...


I used a simply Whisper White base and added a Mambo Melon layer that was punched with the Scallop Trim Border.  I then added a layer from a New DSP called Gingham Garden!  Cute right?  There is some Organza Ribbon and the left accents are in Pear Pizzazz and punched from the Bird Builder punch. 

Ok that really cute blue flower; it is Simply Pressed Clay that I added a couple of drop of Marina Mist re-inker to.   I then put it in the Blossoms Clay Mold and Ta-Da ... A blue flower!

I stamped the Happy Birthday from Bring on the Cake and added some pearls to finish the effect.

I hope you like it.  Let me know what you think!

REMEMBER - This is the LAST WEEK of the current Catalogue so get the Retiring Items while you can! Also the Spring Mini retires on May 31!
Janet Y


Wednesday, May 8, 2013

Bombs Away Birthday Set

I am a little behind in my posts lately.  The weather has finally been nice and I have been trying to enjoy it!  So now that we are back to seasonal temperatures and the wind is a bit chilly I got back in my craft room yesterday.   A few weeks ago Stampin' Up released their second Photopolymer Stamp Set and I fell in love with it right away.  It is so fun for Birthdays!  

This is the first card I have made with it, it is totally retro and so fun.


When is the last time you listened to vinyl?  I am just in love with these cute records.  I simply used circle punches to create the records and stamped the sentiment in basic black.  The cardstock is also simply Whisper White and Basic Black.  This card could not be easier to make! 
 
Check out the Bombs Away Birthday set!
 
Bombs Away Birthday Stamp Set
How great are these sentiments?! 
 
Bombs Away Birthday Photopolymer Stamp Set 133411 $16.95 CAD
 
 
REMEMBER - There is less than one month left of the current Catalogue so get the Retiring Items while you can! Also the Spring Mini retires on May 31!

Also don't forget to look for Treasure Hunt Clues and enter to win the Prize. ENDS May 12.

Janet Y


Thursday, April 11, 2013

Pac-man on Pinterest

I have been on Pinterest for about a year I think and I love it!  There are endless ideas for any topic!  Funny jokes, recipes, art, and of course crafts.  Cards, Scrapbooking and various Paper crafts can be found in abundance!  This card has been in my "Stampin' Up Ideas" folder for a long time and last weekend I finally had a reason to make it.  My youngest went to a Wreck-it Ralph Movie party.   Because of the video game theme of the movie I thought this card would be great!  The original is from Dany Piepgrass at INKcredible Kreations.


On the inside of the card I stamped a set of cherries from the retired Tart and Tangy Stamp set.  I used the 1 1/4" circle punch to create Pac-man in Daffodil Delight.   The ghosts are Real Red and Pumpkin Pie and punched from the Owl Builder Punch.  I also used the Word Window punch, Corner Rounder Punch, and a small circle punch from the Punch Pack.


This Birthday party was a joint party for two of her little friends and the second card I gave is one of my favourites from the past.  Since it was a movie party I thought a Popcorn card would be perfect.  Check out my original post from Sept. 12


Happy Birthday Kaiden and Cassie!


Also don't forget to look for Treasure Hunt Clues and enter to win the Prize.
Janet Y

Still Love Stampin' Up's Wood Mount Stamps

Check out Stampin' Up's ALL NEW wood mount stamp cases!  I love these.  Endless possibilities!
I love the clear mount stamps but this is a MUCH better way to store the wood mount sets.


 And remember the other day when I showed you the Photopolymer Stamp set and the Card I made with it?  While SU has another one coming out and I just love it!!


Bombs Away Birthday Photopolymer Stamp Set
$16.95


133411


Includes 7 pieces. Recommend clear blocks C and H. Purchase separately.

 I cannot wait to get my hands on this set!  It's too bad I don't have it now, My Dad turns 65 next week and this set would be great for him!  


Also don't forget to look for Treasure Hunt Clues and enter to win the Prize.
 

Janet Y


Wednesday, January 30, 2013

Happy Birthday Charity!

Yesterday was my good friend and neighbour's Birthday!  Every year we exchange coffee cards on our birthdays!  I love Starbucks and she is a Tim Horton's girl.  I wanted to make a card that is coffee themed.  There is a great set from the Sale-a-bration flyer called "Patterned Occasions"  with a wonderful little "whole latte love" stamp.  I added the "On your Birthday" and made the card a 3x6.   I used mainly  Regals and Brights for the colors and that is new for me as I rarely use the Regals!


Inside I added a little folder to hold the Tim Hortons Card. She loved the card and the gift but that is not surprising as she is one of the sweetest people I know! 
 
Happy Birthday my Friend!


Don't you just love this stamp!  The "Patterned Occasions" set is super cute and you can earn if for FREE until March 22 with the Sale-a-Bration special that is no now!
 
 
Have a great Day!!!
 
Janet Y
janetyates@shaw.ca 


Sunday, October 28, 2012

Rainbow Cake -- Thank you Pinterest

I think I am in love with Pinterest. I have used so many great ideas from there!  Flavoured water (yum!), Pink Party punch (double yum!!), Card Ideas, Owl and Bird Punch Ideas (see yesterday's post) and I am sure there is more!
 
So when it came time to create a cake for my daughters 8th birthday I went to pinterest for inspiration.  Since her favourite colour is "Rainbow" I thought I would give this great rainbow cake a shot.  I did my research on Pinterest and You Tube and went to find the supplies. 
 
 
Here is how I did it!
 
Two white cake mixes made as per directions,  6 bowls, a 10x14 inch pan, and dye.  The dye most people recommended were the Wilton's Gel Dye.  I used Red Red, Orange, Lemon Yellow, Leaf Green, Royal Blue, and Violet.
 
 
I divided the batter in to the six bowls equally and then added the colours.   Pretty eh?
 
Once all of the batter was ready to go, stir well so all the batter is coloured equally,  I then  poured the batter in as follows.  Purple first spread out evenly over the entire bottom.  I then added the blue, green, yellow, orange and red as shown.
 Do not mix but tap the pan on the counter to even out the batter. I jiggled it a bit too.  Pop in the oven and bake. 
HINT - mine over cooked on the outside before the inside was done so turn the oven down to say 300F or 325F maybe (I cooked mine as per the box at 350F but that was too hot).  I added about 10 minutes on to the time too. 
Ok here it is out of the oven.  The bottom was pretty brown from the heat but it still looked awesome when I cut in to it (see below).   Be sure a toothpick inserted to the middle comes out clean. 

 
Here it is decorated!  Two cans of fluffy white icing with a bit of Sky Blue dye and I then used skittles and mini marshmallows to create a rainbow! Fun right!!?  I also used my Stampin' Skills to create fun banner (Pennant Punch and Brights DSP) and pick. 
 
 
Here are the end results!  I love how the colours turned out! It is really bright and fun.  Each piece will be different.  It tastes yummy too!  You know how kids usually eat the icing and leave the cake! This did not happen with this cake. Almost all of the kids ate every bite! 


Cake Supply List and tips ..
 
  • 2 Cake mixes and ingredants as per box. 
  • a 10 x 14 cake pan (greased)
  • Good quality Food Colouring (I used Wiltons Gel Dyes)
    •  Use  Red, Orange, Yellow, Green, Blue, and Purple
  • 6 bowls
Tips...
Turn oven down a least 25 degrees F as to avoid the outside from over cooking.  Use a toothpick to ensure the middle is cooked all the way through.  Freeze the cake before icing it, I wrapped mine in wax paper, glad wrap and tin foil (over kill I know but I found this online and I did not want to risk it).  Buy Regular and Tropical Skittles (there is no blue in the regular pack!). 
 
Ok I think I covered it.  I am so happy with this cake. It is my first attempt at a real cake for my kids. I am a total buy it from the baker Mom but this was pretty easy!
 
Here is my girl blowing out her candle! 
 
Have a great day!  And remember tomorrow is a Special Day at Stampin' Up!  15% off almost all stamp sets!!
 
Thanks for looking!
Janet Y


Related Posts Plugin for WordPress, Blogger...