Pages

Showing posts with label Valentines. Show all posts

Wednesday, January 22, 2014

Valentine - The Paper Players Challenge #179

The Paper Players Challenge #179, a single layer Valentine's Challenge.   


I like simple cards.  This is no secret. I love all of the entries in this challenge and could easily CASE them! They are amazing.  I wanted to try something I don't do often.  I join challenges to be challenged so I wanted to create something simple but out of my comfort zone.

I used masking  and spritzers to create this card.   Real Red and Smoky Slate ink were used to create the heart and "love"  I added a glittery "u" and some bling for a small amount of embellishments.    I hope you like it!


Check out all of the great entries and samples for this challenge. 


Wednesday, January 1, 2014

Happy New Year!


Well I have been taking a bit of a break from my craft room so I am sorry I have not been on here much in the past couple of weeks.   Honestly my craft room becomes Christmas central and is a wasteland for most of December.  I am finally cleaning it up and getting back to business.  

I got a few items from the all new Occasions Catalogue coming out this month and I will be playing with them this week.
Until I get it together enough to have some photos to post for you I wanted to show you some of the new items Stampin' UP products that have come out over the past two weeks and remind you of the Weekly Deals available now.

Valentines Day is approaching (I know you just packed up the Christmas stuff!!) and Stampin' Up has some truly adorable kits available now.

A Whole Lot Of Love

Remember last year, I do, like it was yesterday!  Stampin' UP came out with a great stamping option when they introduced a new line of stamps.  Photo Polymer stamps are less expensive than the original stamps, they are easy to place and stay on those little acrylic blocks!  There is a new set available right now that is completely fun and great for Valentines or Wedding Cards.


Weekly Deals

And don't forget, Stampin' Up just added NEW Items to the Clearance Rack!

Stampin' Up! Clearance Products

Janet Y


Wednesday, February 13, 2013

Happy Valentine's Day!!

Ok I know I am a day early.  But I am heading to West Edmonton Mall with my kids for our annual Family Day Long Weekend Trip to Edmonton.  So I am posting today as I plan to leave the computer at home with the hubby! 

Today was both of the kiddies Valentines Parties at their schools so we have loads of cute Valentines and candy and pencils ect...

Here is the run down on what we gave away, including Megan's fun Pinterest inspired Card and Jillian's little treat Matchbox Valentines.   I also made a few little treats for my day home girls. 


At Jillian's School there is a No Treat Policy,  Much to her dismay!  So I found some cute little stickers in boxes at the dollar store and they fit perfectly inside the SU Matchbox Die.  I did all the cutting and assembling of the boxes and Jillian added on the hearts and birds.  She loves to craft and really enjoyed creating these for her classmates.

 For my day home kids I bought Smarties!  In Canada Smarties are similar to M&M's but kids seem to like them even more (I kind of do too).  I created these wrappers out of retired DSP and crimped the edges.  I love how they turned out.  I then added a quick label using the Hearts A Flutter Framelits and Stamp Set.
Here is another view of the same thing.  I just used the measurements of the box of candy and added 3" to the length so I had enough on the ends to crimp.

I saved my favourite Valentine for last.  I found a number of these photos on Pinterest (LOVE that site) and since Megan is still in Pre-School and allowed to give candy I thought I would give them a shot.  I really Love how they turned out.  I just added a "Happy Valentine - From Megan"  and sent them off to Walmart for printing.  A couple of hole punches using my handy Crop-a-dile and a sucker!  LOVE IT!!
 
 
Have a wonderful Weekend and a very Happy Valentines Day!
 
 
Have a great Day!!!
Janet Y
janetyates@shaw.ca 

Thursday, January 31, 2013

Spritzed Valentine -- With Love

I bought some Stampin Up Spritzers a while ago and have been looking at them with loads of intention!  Every time I go to pull them out I get sidetracked on to something else.  Considering that it only took me 5 minutes to make this card I really have no idea why I waited!

I used rubbing alcohol and Real Red re-inker.   I placed a heart a piece of whisper white card stock and then sprayed the paper with the Spritzer and as you can see it created a really great effect once I removed the heart.
 
I used some retired Basic Black Ribbon and added a black heart covered in rhinestones! 
 
 
Let me know what you think!
 
Have a great Day!!!
Janet Y
janetyates@shaw.ca 

Friday, January 25, 2013

Valentines Sliding Treat Holder - Tutorial

I have been thinking about how to give my kids some cute Valentines gifts this year and one of my ideas was a Pez dispenser.  I came up with this sliding treat holder.   Hope you like it! :)


Supplies

Real Red Card Stock
Adhesive|
Heart Punch or Framelit
Stamps, Ribbon, DSP
Paper Cutter


You will need the following sizes of Real Red for the base.

5 1/4" x 4 3/8"

6 3/4" x 3 1/2"

1" x 10"


Score the 5 1/4" x 4 3/8" piece at
1/2, 1 3/4, 2 7/8, 4 1/8 on the long side.

Score the 6 3/4" x 3 1/2" piece at
1 1/4 on all sides.

Score the 1" x 10" at every inch.

Once you have the pieces scored you can assemble them as you see to the right.

Hint -- Decorate the outer 5 1/4 x 4 3/8 sleeve before you glue that piece together.


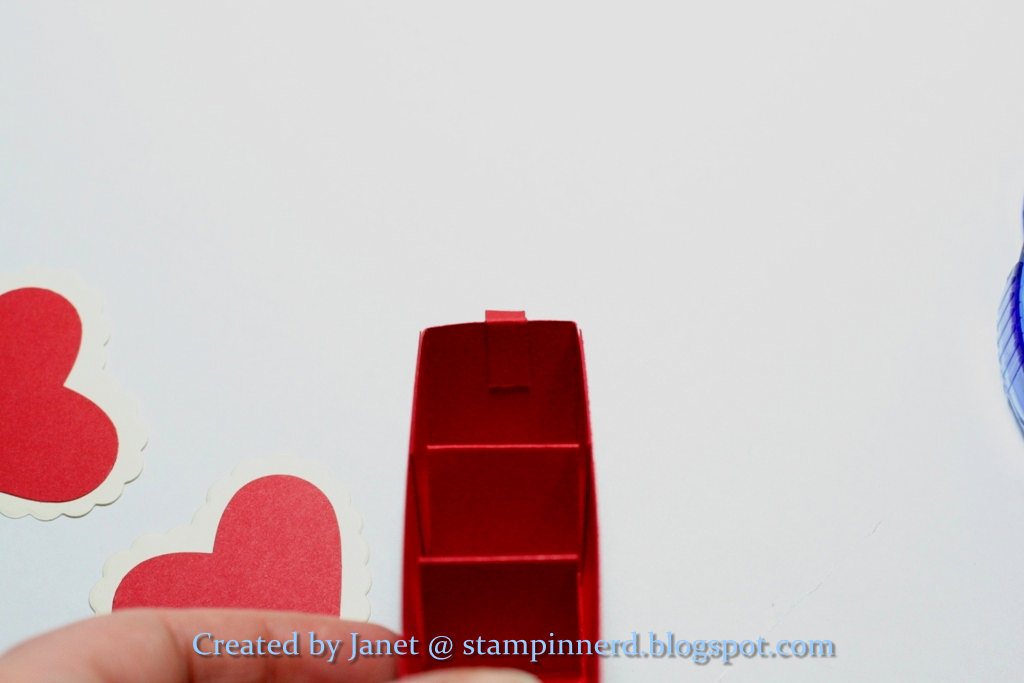
This is the inside piece.  Using the long 10" x 1" piece I created slots for my candies.  I adhered this in to the open box 6 3/4 x 3 1/2 piece.


For the top piece or the "pull" I used a small scrap piece of Real Red measuring 1/4" x 3".  I then folded it into a W (scoring at about 1, 1 1/2 and 2.


I glued this small piece on to the top of my insert and made sure to fold part of it into the top as you see to the right so it would not just pop off when you pulled on it.
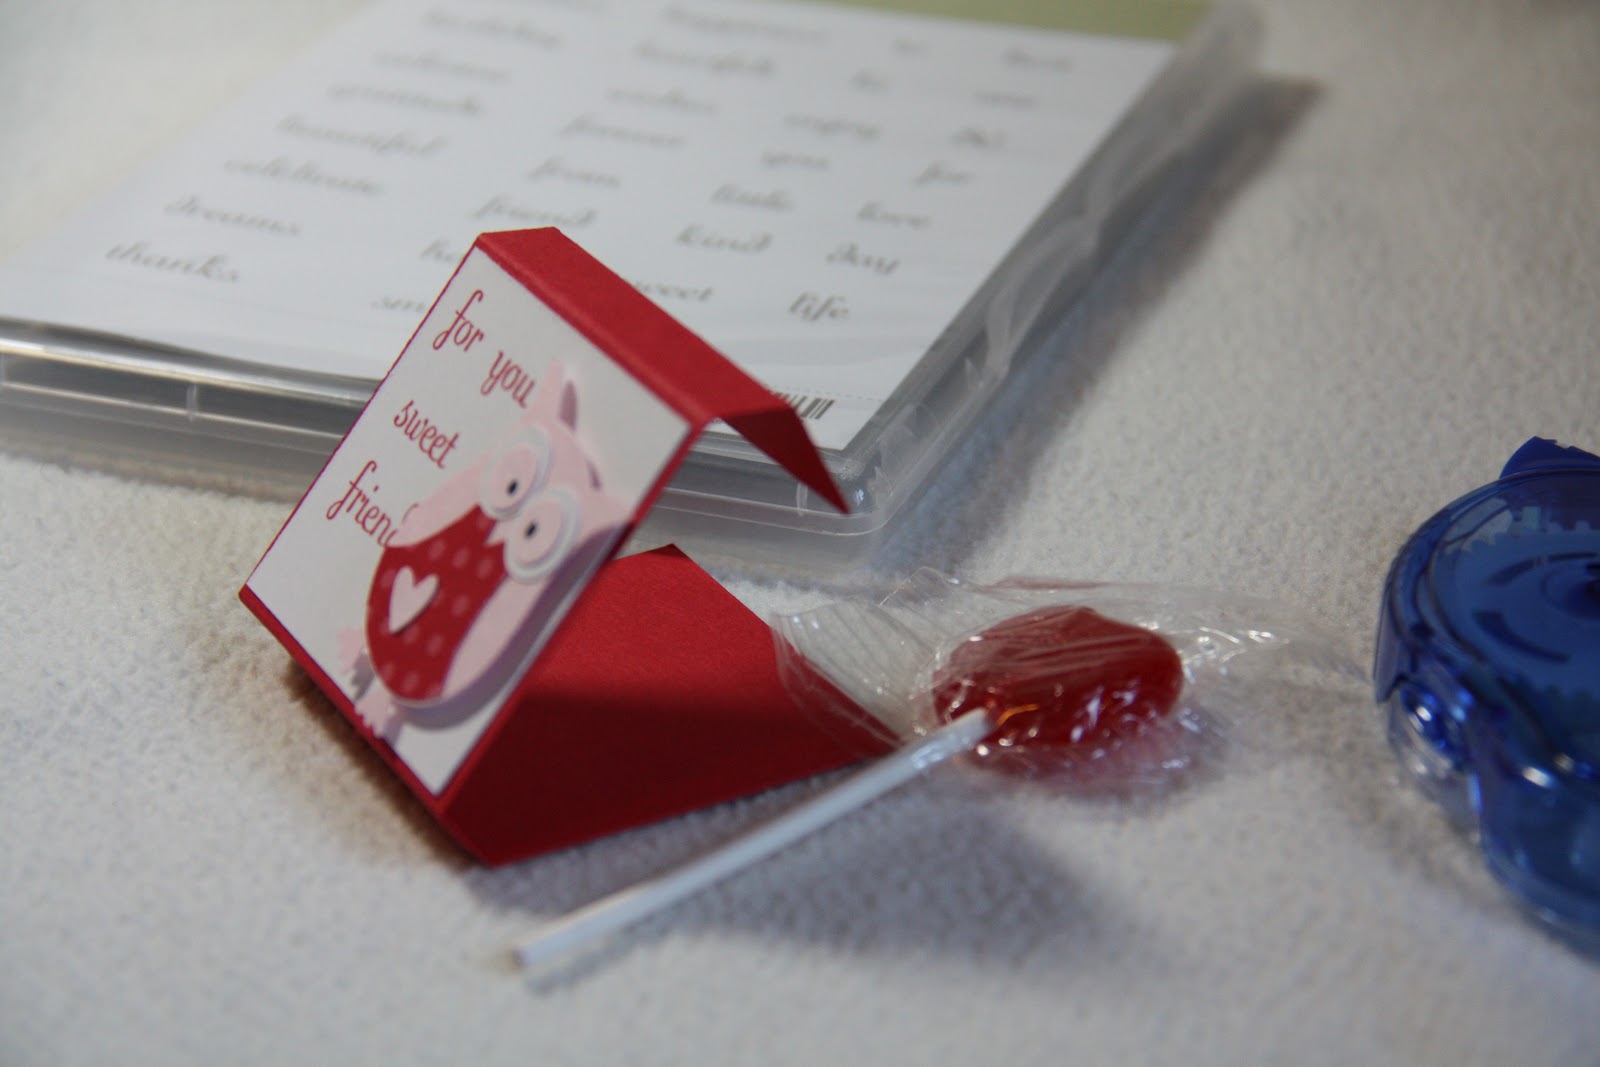
From a different angle you can see the small lip I created to attach the heart to.
I have no idea why I took this picture upside down but I forgot to flip it in editing so there you go!  The Hearts attach to the small lip, one on either side.


Below is the finished product.  You just fill with treats (I used Kisses) and give to your Valentine!
 
 
Don't forget Sale-a-Bration is on right now!  Click below to see how you can get FREE stuff!!


Have a great Day!!!
Janet Y
janetyates@shaw.ca 


Saturday, January 19, 2013

Spring Mini - Hearts a Flutter Neutral


I seem to be attracted to the more neutral cards lately, cards with lots of white space or tone on tone.   I have seen a few Vanilla on White cards lately and I really like the look of them. 


  For this card I used a White base, Vanilla textured layer and Crumb Cake Ink and Seam Binding Ribbon. The "Hearts a Flutter" Stamp set and Framelits is very quickly becoming my favourite bundle in the new Mini, here I used it for the large hearts.  For texture I used the Honeycomb Embossing Folder and sponged the edges with Crumb Cake.

The small heart embellishment is a Vanilla heart covered in the pearl accents from the Catalogue.

In other news...


Last night I got a belated Christmas gift from my wonderful friend and client Nicole.  I just love the use of Designer Fabric for the lid and label made with the Window Framelits Collection (page 36 of the new Mini).  

Thanks Nicole, I cannot wait to make the cookies!
 
 
Have a great Day!!!
Janet Y
janetyates@shaw.ca 

Monday, January 7, 2013

New Blog Header -- Have you seen it?!!

I really enjoy updating my Blog Header to reflect my style of the season.  With Valentines coming up of course everything is all hearts and flowers so I put some of the New Spring goodies to use on this fun Valentine's Card.  Below is the full front of the card!  The ribbon is two-toned black and grey and I just love the look of it. 

 
The flower accent is from the Artisan Embellishment Kit and those little butterflies are from a new punch!  Not to mention the new Honeycomb Embossing Folder ... Love this folder!  The colours I used were Real Red, Going Grey, Pink Pirouette and Very Vanilla.
 
Hope you like the New Blog Header and the card!
 
Have a great Day!!!
Janet Y
janetyates@shaw.ca 


Friday, January 4, 2013

Challenge -- Freshly Made Sketches #67

Well it is time for me to play along with another challenge.  It is a great way to get my hands on some of the new spring products!  


This is a 5x5 card using Chocolate Chip as a base.  I used the Adorning Accents Folders and Edgelits in Vanilla and Crumb Cake and the Raspberry Ripple Ribbon to accent.   The hearts are from the new Hearts a Flutter Stamp set and Framelits dies.  I used the tag punch and "Love" from the Fabulous Phrases Stamp Set.  

To see all of the entries at Freshly Made Sketches  Click Here
 
Have a great Day!!!
Janet Y

Saturday, December 29, 2012

It's not Christmas anymore....

Well tomorrow my house will be de-christmased (is that a word?).  So today I move on.   I have not had anytime for my craft room and hope to get in there next week but until then here is a little card I whipped up for Valentines day!   I saw the Valentines Day Cards in the Hallmark store yesterday and could not believe it but there it was.  So here I am putting it out there!  Happy Valentines LOL!


There were a number of Ribbon cards at Christmas time so I thought I would try the technique with some hearts!  I used the Primrose Petals and Raspberry Ripple Ribbon and Paper for this card as well as Whisper White.
I will have some new products to show you in my next post and remember the new Mini starts on January 1.   There are some really great products and I will put some of them into action this week.  Also remember that Sale-a-bration starts on January 22!  For every $60.00 CAD you spend you get to choose a free item from the special Sale-a-bration flyer!  If you would like a mini or a flyer please contact for your free copy!
 
 
Have a great Day!!!
Janet Y
janetyates@shaw.ca 
 

Saturday, December 1, 2012

Challenge -- Freshly Made Sketches #63

I know we still have 24 days until Christmas and I totally seem like an overachiever to be making Valentines cards but I have made a LOAD of Christmas cards and wanted to try something new!
So here is my newest challenge.


I used a Crumb Cake base and a Very Vanilla layer.  The seam binding ribbon is Cherry Cobbler and Crumb Cake.  I used the Hearts Framelits to create the hearts and embossed them an embossing folder (I do not know the name of the one I used, it is not SU) similar to the Vintage Wallpaper Folder. The "Love" stamp is from a retired set called "  and of course I added shimmer!
To see all of the wonderful cards go to Freshly Made Sketches.


Have a great day

Janet Y

janetyates@shaw.ca 


Tuesday, February 14, 2012

Happy Valentines Day

Just a quick note to wish you a wonderful Valentines Day. Have a great day!

Friday, February 3, 2012

Easy Valentine's Tutorial "Matchbook Sucker Holder"

I don't know about you but I love making class treats!  I know the little ones won't appreciate the effort but it's not about that for me.  I just enjoy the creation process and the feeling of "I made that!" 

I have a limited time to get to make class treats for my kids' school.  Our Elementary school does not allow candy to be given out at all so I only have a couple of years while my youngest is in pre-school.  I am making the most of it while not going overboard (at least I don't think this is too crazy). 
I thought I would try my hand at a photo tutorial just to show the process of a simple class gift.


Real Red Card Stock cut down to 2 1/4 x 5 1/2.
Score at 2", 2 3/8", 4 3/8" and 4 3/4"  (shown here using Simply Scored tool from Stampin UP)

 Between the score lines of 2" and 2 3/8" use the crop-o-dial to punch a hole for the sucker. 


Cut a piece of Whisper White down to 2 1/8" x 1 7/8" for the front of the match book. Using the owl punch from Stampin UP create an owl.  I used Real Red DSP, Pink Pirouette and Whisper White to create a Valentine Owl.


Using Fabulous Phrases I created a phrase for the front "For You Sweet Friend" stamped in Real Red.


Fold the matchbook over and right below the flap put a dimensional sticker. On Whisper White stamp "Happy Valentines Day" from the Teeny Tiny Wishes in Real Red. Punch out with the Modern Label Punch and adhere to the dimensional as close to the bottom of the label as possible without the dimensional showing. This gives you a slot to fit the flap into and keep the matchbook closed.


 Slide the sucker into the hole at the bottom.
 Close up; add some ribbon around the stem of the sucker for decoration and you're done.


Hope you enjoyed my First Tutorial!  Thanks for stopping by.

Saturday, January 14, 2012

Love is in the Air

Only one month to Valentines People!! Really those Flower/Card/Candy Companies are already bombarding us with ads and displays in stores (heck I saw Valentines Cards out on Boxing Day!).  So I am getting on board with this and posting a few of my recent projects!  


I have seen these Heart Groom/Bride Cards for a while now and have always wanted to give it a shot.  They are just so pretty and simple!


I made this card with some friends last night.  It is super cute because what you cannot see from the picture is the "heart flower" spins!  Cobbler is my favourite red and I am very sad this ribbon from the Christmas Mini did not make the cut but the new embossing folders in the current mini make up for it! Not to mention the very cute Fashionable Hearts embosslits! 

This was just a little card I wanted to play with. I love the gate fold just for something different and the glitter hearts I mean OMG!  Yes it is simple but I roll like that!

Thanks for Looking!


Related Posts Plugin for WordPress, Blogger...