Pages

Wednesday, July 31, 2013

Undefined Excitement!!!

Are you an artist? No!  Me either!   I can barely draw a straight line, so when I heard about an all new tool from Stampin' Up that allowed you to carve your own stamps I was not overly excited.   That was until I watched Shannon from Stampin' Up create Eggs and Bacon!  That's right, Eggs and Bacon.  Super cute and so easy!

It got me thinking about what I would want in a stamp.  What kind of stamp would mean something to me and also be easy for me to draw and carve?   I decided to go with one of my favourite Canadian symbols.  The Inukshuk.   I grew up in the Northwest Territories and this was a common place symbol on lawns, stationary and town sculptures.   In fact I have one in my front yard still.

So I looked on-line for some ideas, and saw a few that I liked the look of and had simple lines.  I drew one out on scrap paper and set about carving it!  I really love how it turned out, let me know what you think.


Carving was relatively easy.   The two tools they supply are really easy to use.   I made a bit of a mess but I caulk that up to my inexperience.

I stamped the Inukshuk in Midnight Muse and used Daffodil Delight, Pool Party and Island Indigo for the background, paper and ribbon.
The kit comes with a piece of rubber for carving, two carving tools, Adhesive foam, wood mount blocks and an Island Indigo Marker.   I was lucky enough to get a small piece of rubber, foam and a block at convention so I used that as my test piece.   I traced the polar bear from my mothers NWT luggage tag and carved it on to the rubber.   It turned out ok but the nose was hard to get right.  I put this on the inside of my card (see below).
 
 
If you want to see some more wonderful ideas for the Undefined kit check out Stampin' Up's Pinterest site.  They have a board dedicated to the Undefined kit.  Some people are so talented!
 
Check out a quick video here to see it in action.


Thanks for looking!  Have a great day.
 
Janet Y


Saturday, July 27, 2013

Swap to C.A.S.E. part 2

Here is the second card in my S2C (swap to case) series, this one is more of a straight across copy with one major exception.   I fell in love with the simplicity and beauty of this card as soon as I saw it.   In my mind however, I saw this card in Coast Cabana and wanted to see how that would look using exactly the same design and secondary colours.  

The Swap card on the Left was created by Kaiysha Vest, my take on it is on the right. 


I kept the Whisper White and Smoky Slate the same but instead of pearls I used rhinestones, mainly because pearls are more vanilla in colour and I wanted to keep it bright and clean.

I really do love the Mosaic Madness stamp set and punch, the possibilities are endless.

The sentiment is from Petite Pairs and is punched out using the Ticket Duo Punch but was modified in size a bit by punching out each side individually.

I have a few more cards on the way in this series and if I get some time in my craft room this week I could have even more!  I got 120 swaps from Convention so there is no end of inspiration here!

Janet Y

Thursday, July 25, 2013

From Swap to C.A.S.E -- Part 1

Swaps are one of the best parts of Convention but usually I make my trades,  look over the cards and pick one or two that I will case and the rest sit around in a box.   I have loads of swaps from over the years.

    This year I decided to try something a little different.   Instead of looking at the card for it's face value I looked at it as a starting point for inspiration.   Even if I did not love it upon first glance I looked closer for what I did love about it.  Maybe I was not a big fan of the colour or it was not my favourite stamp set but that does not mean it could not inspire me to create! 

C.A.S.E. stands for Copy And Share Everything so I thought I about that when I looked at each swap.  I have to say at Convention this year I got a lot of great swaps so I did not have to work hard to come up with my own version of these.

Over the next week or two I will be posting a series called Swap to CASE.  I will be giving you examples of the swaps I have received and how I recreated them with my own twist.  

Lets get started.  


The Card on the left is the Swap I received from Lynne Seijan.  On the right is my card.   I really love the designer tape and wanted to carry that over so I started with that.  I do not have the same stamp set but these little bats from the New Holiday Catalogue are totally adorable.  The Designer Series Paper is the same but I added a larger piece and downsized the top layer so you could see it a bit more.

I used Very Vanilla instead of Whisper White, changed up the sentiment to match my card and added bling (Rhinestones) mainly because I love bling!

One thing about swaps you should know is that most swaps are just a card front and therefore do not have a base attached.  I added a base to all of my cards but I tried not to change the layers too much otherwise.

Well that is my first card in my Swap to CASE series.  I have more on the way so keep checking back.

Janet Y


Tuesday, July 23, 2013

Convention 2013 - Swaps

Well it's time for me to get back to my day to day.  Today is my Mom's 65th Birthday and we had cupcakes and BBQ Chicken.  We kept it low-key just the way she likes things.   As a present for my Mom I brought her to Salt Lake City with me and it was an awesome trip!  One of the best parts of Convention was coming home everyday with swaps to show my Mom.   I will try to get some photos up here of some of my favourites.

So back my swaps. 

First off I want to tell you how I made my Serene Silhouettes Window card.  I love simple yet elegant cards.  They seem to have the most impact.  This one was so easy and fun.   I remember a few Christmas's ago I saw a similar card using Lovely as a Tree and a blue sky.  I just love the sponged look of a sunset so I thought I would use Serene Silhouettes and create a Sunset.  I tried a few colour combinations and finally settled on Tangerine Tango and Daffodil Delight.


Once I stamped my image and sponged on my colours I punched it out with the XL oval punch.  I then embossed the top Vanilla layer with the Designer Frames Textured Embossing Folder.  How did I do this without creating creases you ask?  See Picture Below.

I put it in just as you see here.  As you may or may not know, when you put a folder through the Big Shot you should always put the seem through first!  Well here you do not do that.  Put the open end in first to avoid the crease on the page.

I used the "Hello" stamp from Lacy & Lovely and used Dimentionals to make the top layer pop. 


Now to the very popular "Records" Card.  If you have been following my blog you know I created a similar card back in May - Bombs Away Birthday that was my inspiration for this swap.  Of course the Sentiment from the Bombs Away Birthday stamp set gave me the inspiration for the Records.  To create those records I used 1 3/4" Circle punch and the 3/4" Circle punch plus a paper piercing tool for the center.  


I mixed up the center colours make things interesting.  Here is my original again and my Swap at the bottom.


There is not much more to say about this card as it is so simple and fun.   You need to get to this Bombs Away Birthday set, it is so funny!

If you got one of my swaps at convention I just want to say Thank you for Swapping with me!  I really hope you like them!  

Janet Y


Monday, July 22, 2013

Convention 2013 part three!!!

Well the time is flying by and I cannot believe I have been home for 2 days already!  The last day of convention was jam packed with two general sessions, 3 classes and a very busy lunch hour!  Then the quick flight home!

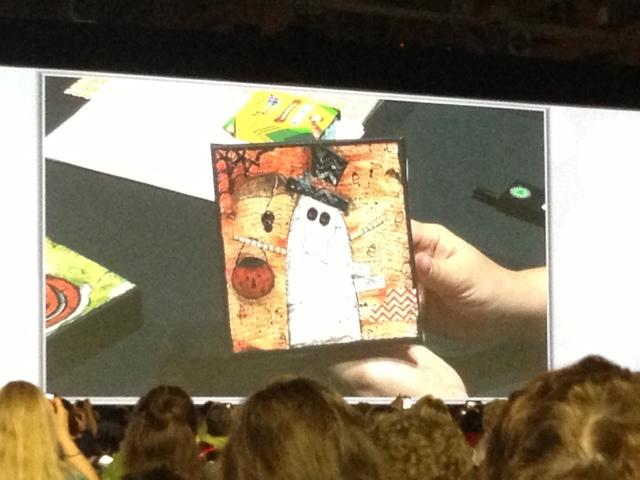
One of my favorite projects from convention was in my Living a Creative Life class taught by Carrie Cudney from Stampin' Up.


She created these lovely mixed media canvases using Designer Paper, ink, paint and modge podge.  Then she added great touches with buttons, glitter and other embellishments.

Just one of the many great examples of creativity from Stampin' Up.


I had a wonderful time and met loads of nice people which included visiting with old friends.  Here I am with Martha who I had met the last time I was in Salt Lake.

Keep checking back for the details on my swaps and some new projects created with my goodies from Convention.

Janet Y.

Friday, July 19, 2013

Convention 2013 part two!!


Well day two is almost over and what a day it was.  General session was amazing!  They announced some really spectacular new products that will be arriving soon and I am really excited to show them to you!   

I know I'm teasing you a little but I'm typing on my phone so I'm not going to go in to too much detail!  Lets just say you will be able to let your inner artist shine and create something all your own!

I won a prize patrol today! That was totally awesome.  I also attended a couple of classes and got some amazing inspiration.  


Here is a shot of my prize!  Gift Bow Big L Die from the Holiday Catalogue!!  I can't wait to get creating with this!


Here is a shot of main stage.


Remember yesterday when I showed you my swaps?  Well here is the fruit of my labour.  Look at all that inspiration!  Thanks to everyone who was nice enough to swap with me!

Finally I just want to say how awesome Salt Lake City is.  Everyone is super friendly and the shopping and dining are awesome!   My Mom and I went to the Blue Lemon today and let me tell you,  they make the most AMAZING sandwiches and blueberry lemonade!


My Mom :)

I am heading out to the 25 Year Celebration soon and will hopefully have time to share more tomorrow.   We fly home tomorrow right after the convention so I may not get an update to you until Sunday.   Have a great night!

Janet Y


Thursday, July 18, 2013

Convention 2013 part one!


Well I've just finished my first day of the 2013 Stampin' Up Convention and Wow there are so many wonderful people to meet.  There are over 6000 demonstrators in attendance and the crowds are amazing!  As usual SU had a great general session and there were plenty of giveaways!   Below are a few pictures from today (I used my phone so I hope they are clear enough) including the swaps I made.  

These are my swaps for convention this year.  I just love both of these cards and I have had so many wonderful compliments on them.  I will post instructions on them when I get home for any one who wants them.

Here we are waiting to get into the first General Session.  

This is our convention bag!  I added my own little bling.
This year SU wanted to enter the Guinness Book of World Records by mailing the most greeting cards at one time.  This was the card I made for this and sent it to a fellow demo in the USA.  Below is a photo of me just after mailing the card.  We needed to reach 1000 to beat the record....


Well that is all for today.  I hope to have more for you tomorrow.  

Janet


Wednesday, July 10, 2013

Gingham Garden Joy Fold Card

Next week I am off to Convention and I don't know if I will be posting any new cards before then but I wanted to show you one of the last cards we did for Club last month.  The Joy Fold Card  is an old technique but it is so easy to decorate and make beautiful. You can use any style DSP to make it how ever you want it, such as masculine or child like.   In this case we went with pretty and feminine.


Gingham Garden DSP really makes this card so beautiful.  We used a Melon Mambo base and Island Indigo for the Joy Fold layer with Whisper White for our stamping.  We then used the DSP to layer and add beauty to the card.  

Stamps used were, Papillion Potpourri, Perfectly Penned and Thoughts & Prayers.  Ink used was Island Indigo, Pear Pizzazz, Daffodil Delight and Melon Mambo.


I just love the cheerful look of this card.  For instructions on how to create a Joy Fold Card of your own, check out Split Coast Stampers Tutorial.


I will post some photos from Convention, including the swaps I made and some of the swaps I get!  So exciting!

Have a Great Day!

Janet Y

Saturday, July 6, 2013

Mosiac Madness Thank you

Last month was the end of my first ever Stampin Nerd Club!  I had such a great group of women and I really look forward to starting another club in the fall. For my last club order I gave all of my girls a thank you card I found on "My Creations" website.   I hope you like it.


I used the Mosaic Madness Set and stamped the images in Melon Mambo, Daffodil Delight, Night of Navy and Pool Party.  I used Brights DSP in Daffodil Delight and Tempting Turquoise  for the large pennant and Melon Mambo for the small pennant. 


There is a little flower in the center of the card that is from the itty bitty punch pack and the sentiment is from "Delightful Dozen."  I added rhinestones in varying sizes to complete the look.


Looking for another great gift.. Check out my latest tutorial.  "Book Lovers Gift Box"


Janet Y

Thursday, July 4, 2013

Calgary, Doors are Open


Our Great City and our Great Mayor.  I just had to Share.  :)

Janet

Tuesday, July 2, 2013

Book Lovers Gift Box - Tutorial

A few days ago I posted about some of the gifts I made for my girls teachers.  One in particular got a lot of attention so I thought I would do up a quick tutorial for all of the people who have been asking. 

Here it is, the "Book Lovers Gift Box."  This box holds a gift card perfectly.


Supplies

Designer Series Paper
Card Stock
Chip Board
Strong Adhesive
Sanding Block
Paper Trimmer
Embellishments to Decorate
 
 
Cut your Cardstock down to the following measurements. 
1 piece - 4 x 5 1/4
1 piece - 3 7/8 x 5 1/8
Score both pieces on all sides at 3/4" and cut slits as shown in photo above.

You will also cut a third piece for the spine  4 x 1 1/2  (save for later).

Cut out 2 pieces of Chipboard sized  4 x 2 3/4


 Using sticky strip or strong adhesive create your two halves of the box.  One will be slightly smaller than the other and will fit perfectly inside.  Set aside.


 Now you can cut your DSP sized 4 x 2 3/4.  I cut 4 pieces so I could cover both the inside and outside of the covers.  For my original I actually only used DSP on the outside covers and used the ink on the insides of the covers. 
Using strong adhesive (I used sticky strip and glue) attach the DSP to the Chipboard.  Once they are attached you can use your sanding block to make the edges smooth.
 Now it is time to glue your Cardstock box to your Chipboard Covers. Top picture.

To do this you MUST Put the two side of your Box Together! This is important.


Put the box together using strong adhesive and then, add the front cover on, make sure that the box lines up with the spine side of your book cover.  (Pictured on the Right).  Then add on the back cover and be sure the line up the cover to the same spine side as the front cover. 
Now to add the spine.  Score your card stock piece that is
4 x 1/2 at 1/4" on each of the long sides.

To get that Book Spine Look be sure to add some outward scored lines.  See the spine on the Right, I hope they showed up ok.

Then use sticky strip or some other strong adhesive to glue this to the book covers as shown to the right.


When your book is open it will look like this ...


Now it is time to decorate.  To add a bookmark, just glue some ribbon to the inside of the spine.


A little button, knot or other embellishments add a great little flair and the options for the front are endless.  Stampin' Up has a few new stamp sets and punches that would be great for this project!
 
I just love the This and That DSP for these books.  It is so fun and really versatile.  Another great add-on is the six-sided sampler and punch.
 
Well I hope you find this tutorial helpful and I hope you will comment below and let me know what you think.  If you make some of these I would love to see them.  Email me the link to your blog or a photo of your work.
 
Thanks everyone who had really kind words about my project.
 
Have a great day
 
Janet Y

Related Posts Plugin for WordPress, Blogger...