I think I am in love with Pinterest. I have used so many great ideas from there! Flavoured water (yum!), Pink Party punch (double yum!!), Card Ideas, Owl and Bird Punch Ideas (see yesterday's post) and I am sure there is more!
So when it came time to create a cake for my daughters 8th birthday I went to pinterest for inspiration. Since her favourite colour is "Rainbow" I thought I would give this great rainbow cake a shot. I did my research on Pinterest and You Tube and went to find the supplies.

Here is how I did it!
Two white cake mixes made as per directions, 6 bowls, a 10x14 inch pan, and dye. The dye most people recommended were the Wilton's Gel Dye. I used Red Red, Orange, Lemon Yellow, Leaf Green, Royal Blue, and Violet.

I divided the batter in to the six bowls equally and then added the colours. Pretty eh?
Once all of the batter was ready to go, stir well so all the batter is coloured equally, I then poured the batter in as follows. Purple first spread out evenly over the entire bottom. I then added the blue, green, yellow, orange and red as shown.
Do not mix but tap the pan on the counter to even out the batter. I jiggled it a bit too. Pop in the oven and bake.
HINT - mine over cooked on the outside before the inside was done so turn the oven down to say 300F or 325F maybe (I cooked mine as per the box at 350F but that was too hot). I added about 10 minutes on to the time too.

Ok here it is out of the oven. The bottom was pretty brown from the heat but it still looked awesome when I cut in to it (see below). Be sure a toothpick inserted to the middle comes out clean.

Here it is decorated! Two cans of fluffy white icing with a bit of Sky Blue dye and I then used skittles and mini marshmallows to create a rainbow! Fun right!!? I also used my Stampin' Skills to create fun banner (Pennant Punch and Brights DSP) and pick.

Here are the end results! I love how the colours turned out! It is really bright and fun. Each piece will be different. It tastes yummy too! You know how kids usually eat the icing and leave the cake! This did not happen with this cake. Almost all of the kids ate every bite!
Cake Supply List and tips ..
Tips...
Turn oven down a least 25 degrees F as to avoid the outside from over cooking. Use a toothpick to ensure the middle is cooked all the way through. Freeze the cake before icing it, I wrapped mine in wax paper, glad wrap and tin foil (over kill I know but I found this online and I did not want to risk it). Buy Regular and Tropical Skittles (there is no blue in the regular pack!).
Ok I think I covered it. I am so happy with this cake. It is my first attempt at a real cake for my kids. I am a total buy it from the baker Mom but this was pretty easy!
Here is my girl blowing out her candle!
Have a great day! And remember tomorrow is a Special Day at Stampin' Up! 15% off almost all stamp sets!!
Thanks for looking!
Janet Y


.JPG)


 Here is how I did it!
 I divided the batter in to the six bowls equally and then added the colours. Pretty eh?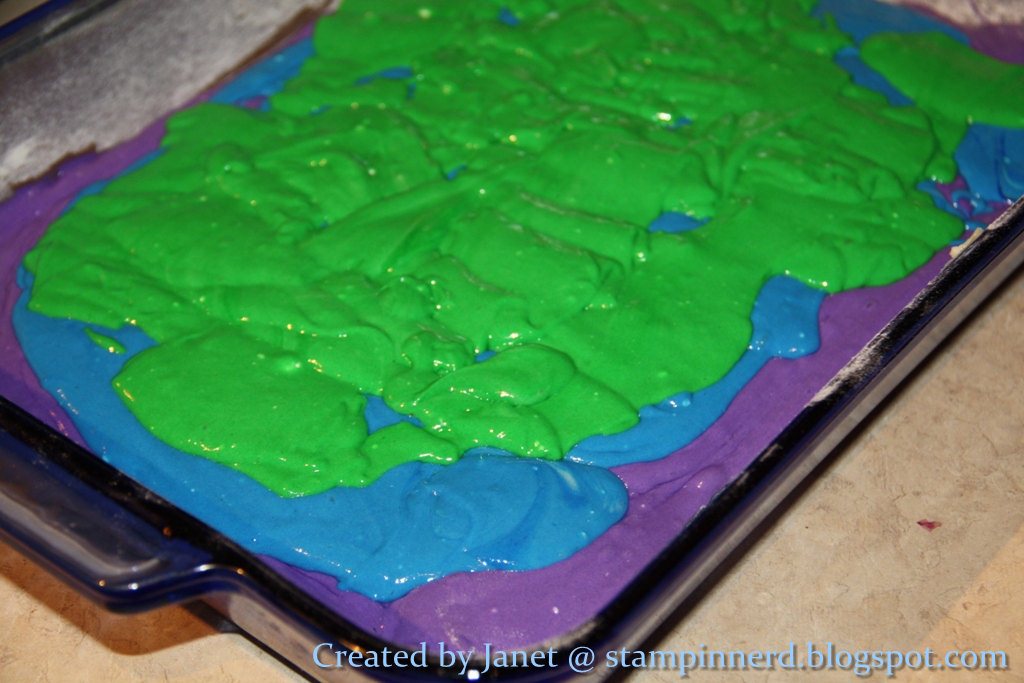

 Ok here it is out of the oven. The bottom was pretty brown from the heat but it still looked awesome when I cut in to it (see below). Be sure a toothpick inserted to the middle comes out clean.


 Above is the outside of the card. I was going to add one bird in the little hole but as I said I could not pick just one so I added them all. I am sure she will be thrilled with them. To the right is the inside of the card. Above starting at the top going clockwise; Blue Jay, Cockatoo, Robin, and a Cardinal. Right; Hummingbird, Chickadee, Robin and Red Winged Blackbird.
  up, up and away
 Lovely as a Tree
 and, World Treasures.

